The cabinets were our first project on the kitchen reno list. Our cabinets were greasy from years of cooking without a vented stove and had painfully outdated hardware, but structurally they were sturdy and actually very nice. They were custom made from maple and extend all the way to the ceiling, which is something we really like for aesthetic and storage purposes. They just needed some serious TLC: paint, new hinges, and new knobs.

Painting cabinets is NOT for the faint of heart, the impatient, or for anyone who isn’t detail-oriented. There are thousands of tutorials on how to do paint cabinets online, so I will not go into extreme detail. The main steps we went through included: remove the doors (and everything inside the cabinets), remove the hardware, degrease them, sand, clean, and paint. If you are going to reuse the hinges, label each door and keep the hinges paired with their corresponding door. DO NOT put all of the hinges in one box and get them mixed up!
To degrease we purchased a degreaser (this one here) and used a green scrubbing pad (click here) to remove the layers of grease that built up over the years. After they were degreased we also cleaned them with soap and water. Cleaning the cabinets is important because the grease will clog up your sandpaper, making the sanding step a pain in the derriere. We did not need to sand the cabinets down to bare wood; our cabinets had a poly finish so we only needed to scuff them so the paint had something to grab onto and not peel after drying. We used 80 or 100 grit paper and sponges. Every little nook and cranny had to be scuffed up so we folded that sandpaper as needed and went for it! The sponge is useful for curved profiles. We also used a random orbital sander for the flat area. Sanding is a critical step – the money is in the details, so prepping everything as much as possible was key for a good paint result.


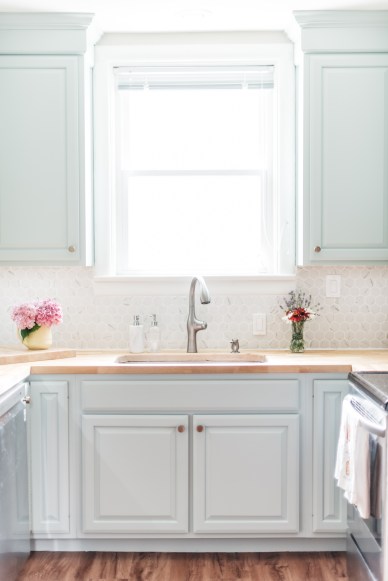
I applied three coats of paint to ensure durability and even color throughout the entire kitchen. A few people recommended that we use a sprayer and we do have one, but I opted to paint with a brush and the end result looks great. We thought about white kitchen cabinets but ultimately decided to add a little color because so many of the rooms in our house are already white. We ultimately landed on the same pale blue color that we used for our cabinets in the play room that I built last year to close up our built-ins. The color is peaceful and calming, bright and cheerful, and it ties the kitchen in nicely with the playroom (they are right next to each other).

One thing we really wanted were soft closing hinges (also on the play room cabinets)…ahhhhh they are so worth it! I ordered the hinges on Amazon (these hinges) and installed them using a Kreg jig for hinges. This jig is extremely useful and I highly recommend getting it if you are planning to undertake a project like this and use concealed hinges. I had to make new holes in the doors for the new hinges and this jig makes it super easy to do and gives you professional looking results. I made the holes after painting because I did not want paint affecting the fit of the new hinges.
With paint and soft closing hinges complete, the last step was to change the hardware. We wanted to match the knobs we used for the play room cabinets (here) so we ordered the exact same ones. They are very easy to install and the metallic color goes well with the rest of the design. Not updating the hardware would have been a terrible mistake. In many cases, if painting is too much to do, changing hardware alone gives the cabinets enough of an updated look.

One last thing, a tip to make the cabinetry look “pro”…use wood filler to fill any holes or gaps in the wood. If there is any separation anywhere between walls, trim, and/or ceiling and the cabinets, caulking these spaces (make sure to use caulk that can be painted) before painting will make the cabinets look seamless and perfectly installed. It’s one of those details that is easily overlooked but make a big difference once everything is done. We used this opportunity to clean the inside of all the cabinets and reorganize the stuff inside to improve the “flow” of the kitchen. We are so happy with the final result – beautiful cabinets with quiet doors!


13 responses to “Painting kitchen cabinets: not for the faint of heart.”
Very nice! Love the color.
Thank you!
As they say: “Painting is all about prepping!” Looks wonderful!
I agree with that haha
I love the color!! Amazing work!
Thank you !
Beautiful work Javier. I usually let Lisa do the painting. She’s so much better than me. Just curious, did you put in full extension drawerslides? I have the Kreg braces for those if you want to borrow.
Thanks! The hardware for the drawers was good for reuse so we did. Thank you for the offer , kreg jigs are so good
Ohhh yes!!! I want to see the after!! Great job guys!!!
I enjoyed to visiting your blog. Love the color!!
Great work! I love your choice color!
So professional looking. Great job.
What color blue is that? Beautiful!